Installation and launch(for v1 Simulator)
Different operating systems correspond to different installation and startup methods, so developers should refer to the corresponding chapters according to the operating system.
- Windows Version Installation
- MacOS Version Installation
- Linux Version Installation
Windows Version Installation
It is recommended to run the installation package with administrator privileges during the process.
Environmental Preparation
The simulator communication relies on the virtual network card, so developers should follow the steps below to install and configure it.
1. Installing a virtual network card
Download and install the Virtual network card Tap-Windows, and perform the default installation.
2. Configuring the virtual network card
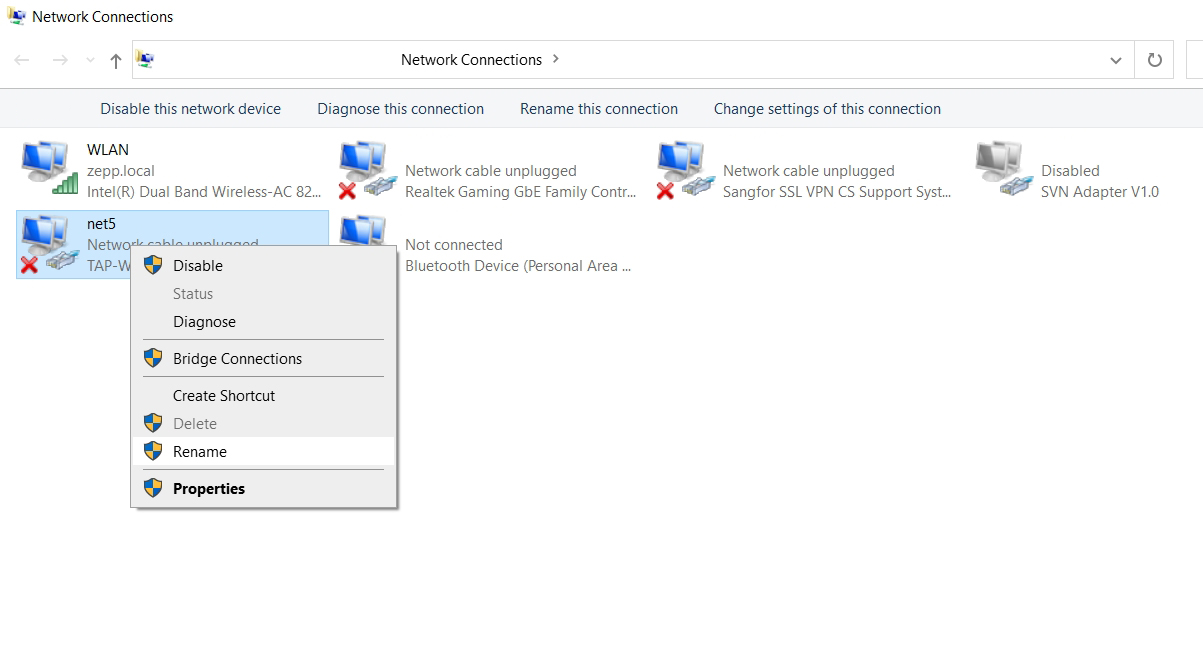
2.1 Rename the virtual network card
Open "Network and Sharing Center" - "Change Adapter Settings" and rename the virtual network card (TAP-Windows Adapter) you installed in the previous step to tun.
2.2 Virtual network card IPv4 Configuration Changes
Right-click to open the properties of tun and select Modify IPv4 Properties.
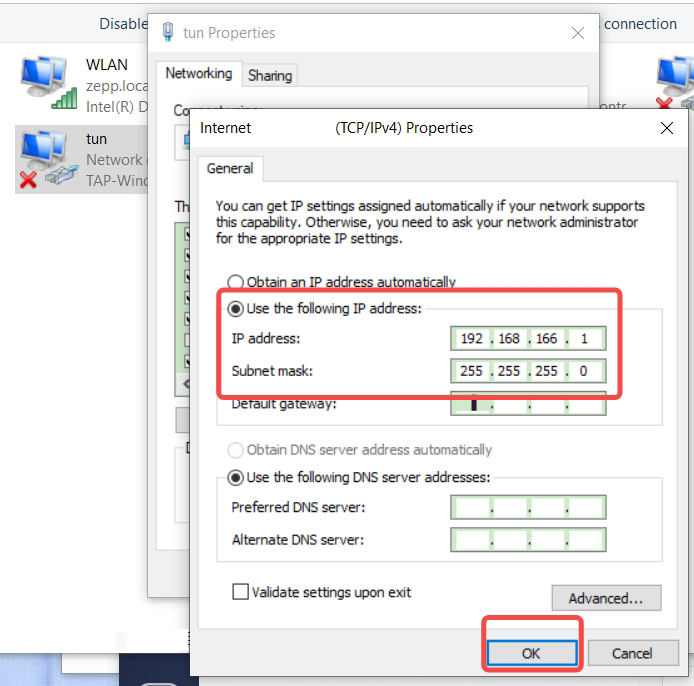
After modifying the configuration to the following, click OK.
Install and launch the Simulator
Download the simulator installer for Windows platform, click to jump to download.
Double click on the simulator icon after installation to start the simulator.

MacOS Version Installation
Environmental Preparation
The simulator communication relies on the virtual network card, so developers should follow the steps below to install and configure it.
Requires macOS version 10.12 Sierra and above.
1. Installing a virtual network card
Tunnelblick is an open source VPN software for macOS, it is easy to install tun/tap system extensions through it.
Two ways to install the Tunnelblick virtual network card are provided.
Method 1: Installation via Homebrew
Execute the following command in the terminal command line.
brew install --cask tunnelblick
Method 2: Visit Tunnelblick official website to download and install the installation package
If you are blocked by macOS during installation or use, you can set permission under "System Preferences" - "Security & Privacy" - "General".
If you do not see a prompt, try installing again.
2. Configuring the virtual network card
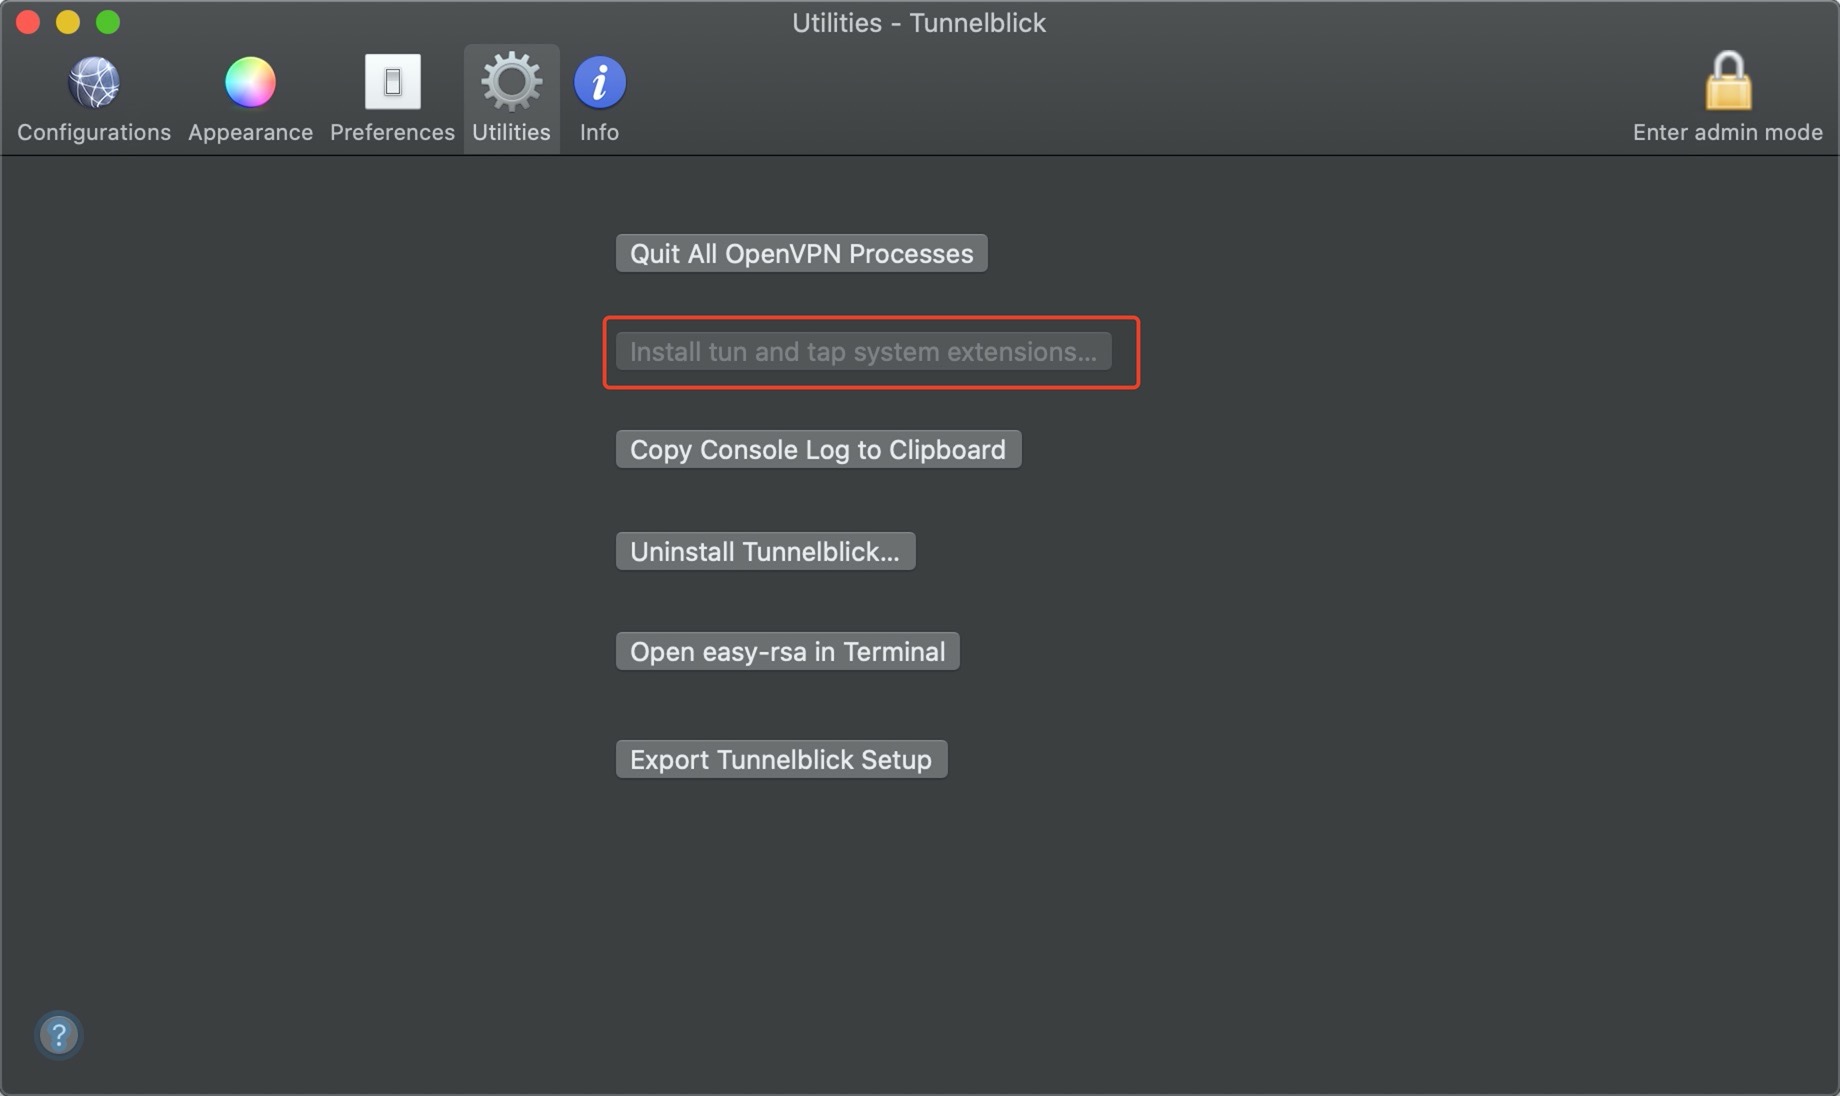
Run Tunnelblick and find the tun/tap installation option in the interface, under the action path Utillites => Install tun and tap system extensions.
3. Verify the virtual network card
Execute the following command from the terminal command line.
ls /dev
Check if tap0 - tap15 appears in the result list, if it does, then the installation is successful.
If the installation fails, please double check the above steps, you can try the following methods
Re-execute Configuring the virtual network card, if it shows that tun/tap system extension is installed, uninstall it first and then reinstall it, and reboot the operating system after the installation is completed.
Install and launch the Simulator
Download the simulator installer for macOS platform, click to jump to download.
If you encounter a system block, please follow the instructions in Configuring the virtual network card above and set the Allow in "System Preferences" - "Security & Privacy" - "General".
After the installation is complete, execute the following command in the terminal to add executable permissions to the simulator startup script.
cd /Applications/simulator.app/Contents/Resources/firmware && chmod +x ./start_qemu.sh
Re-open a terminal and run the following command to start the simulator.
cd /Applications/simulator.app/Contents/MacOS && sudo -s ./simulator
Enter the password and enter OK, the simulator icon appears in the control bar and the simulator starts successfully.
- The simulator communication depends on the virtual network interface card tun/tap, which requires sudo privileges to run, so you need to use the sudo command to run the simulator
- Click on the simulator button of the simulator and try to open the watch simulator, if it does not respond, it is recommended to check the "Security and Privacy" in the system preferences to see if there is a prompt
- If the terminal requires a password, just enter it
- To exit the simulator, press control + c in the terminal or right-click on the control bar icon
Linux Version Installation
Environmental Preparation
It is recommended to use Ubuntu 20.04+ or Debian 11+ to run the simulator.
Installation
Download the simulator installer for Linux platform, click the jump to download, and install it.
You need to get administrator privileges before starting the simulator. $ is normal privileges and # is administrator privileges.
Or execute the following command.
sudo chmod -R 777 /dir
-Rmeans that the cascade is applied to all subdirectories and files in the directory777means that all users have the highest privileges/diris the target folder, this can be the simulator installation directory, usually/opt/simulator
If your installation directory is in /opt you can execute it in the terminal next, if not, you need to execute it in your own installation directory to install the environment.
cd /opt/simulator/resources/firmware/ && sudo ./setup_for_linux.sh
Launch
Execute the command to launch.
cd /opt/simulator/ && ./simulator